How to Swap Tokens in the Web3 Wallet
The Web3 Wallet allows users to swap one token for another directly on-chain without leaving the wallet.
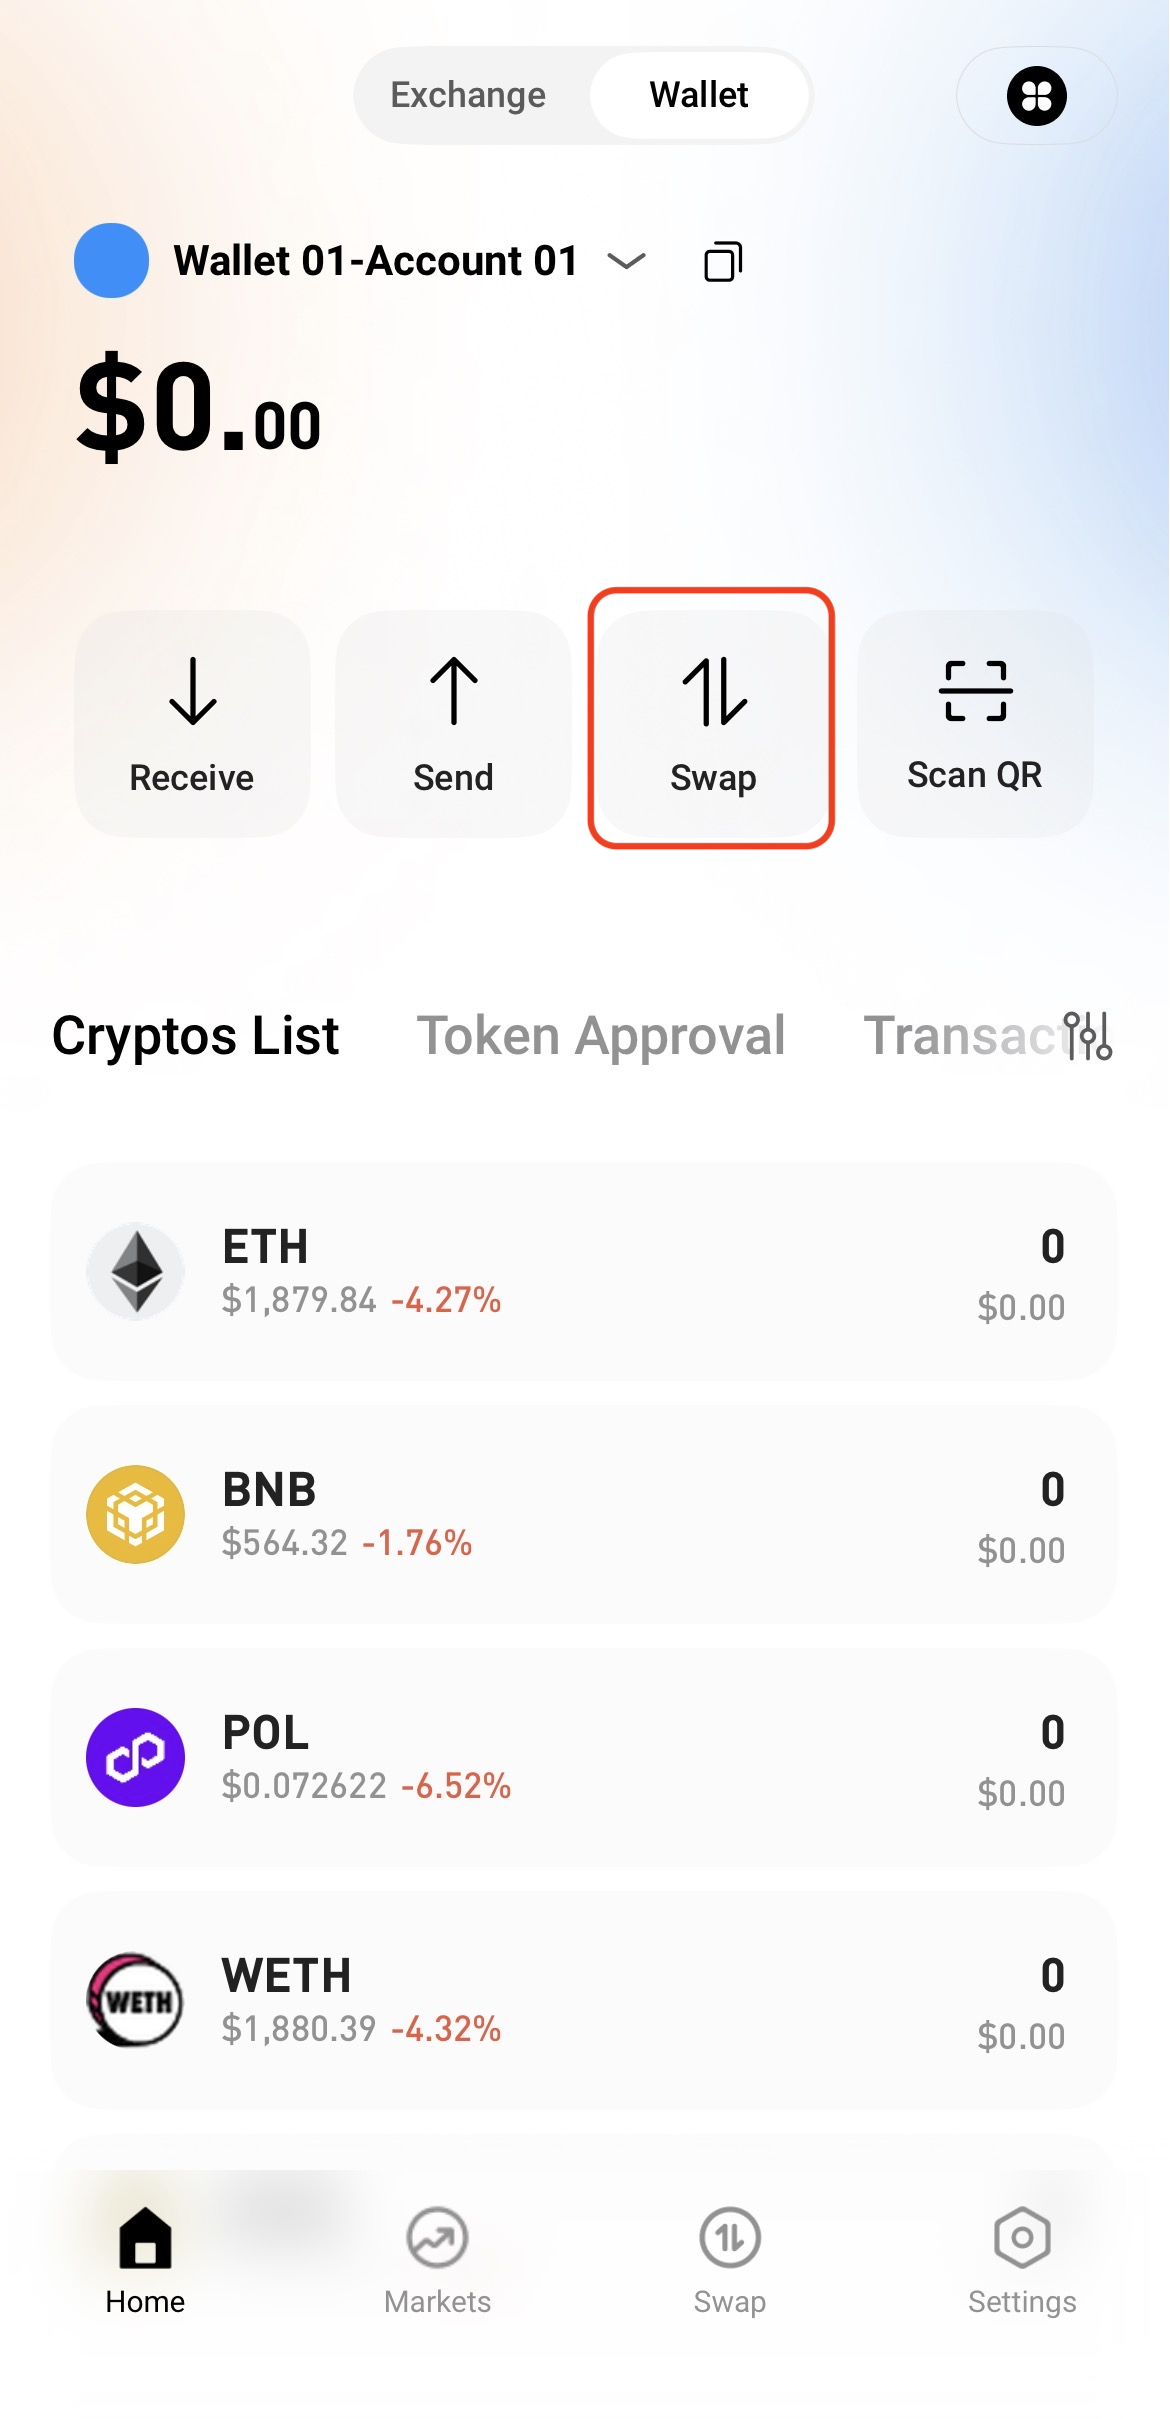
Step 1: Access the Swap Page
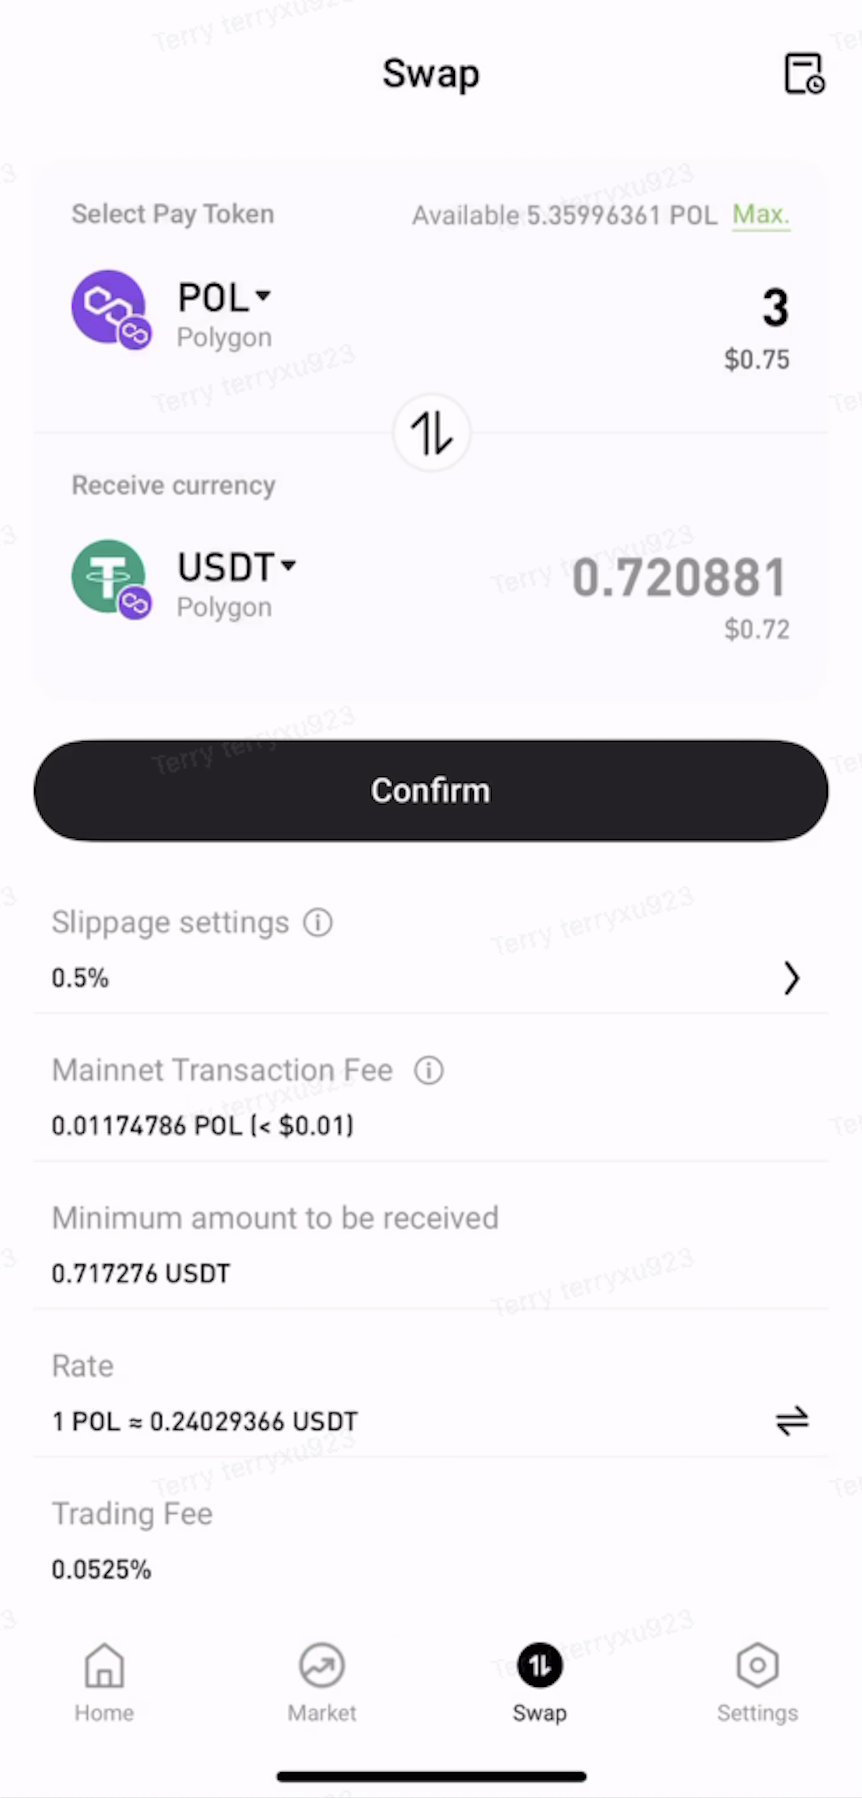
Open the Web3 Wallet and tap Swap on the home page.
Step 2: Select the Tokens to Swap
-
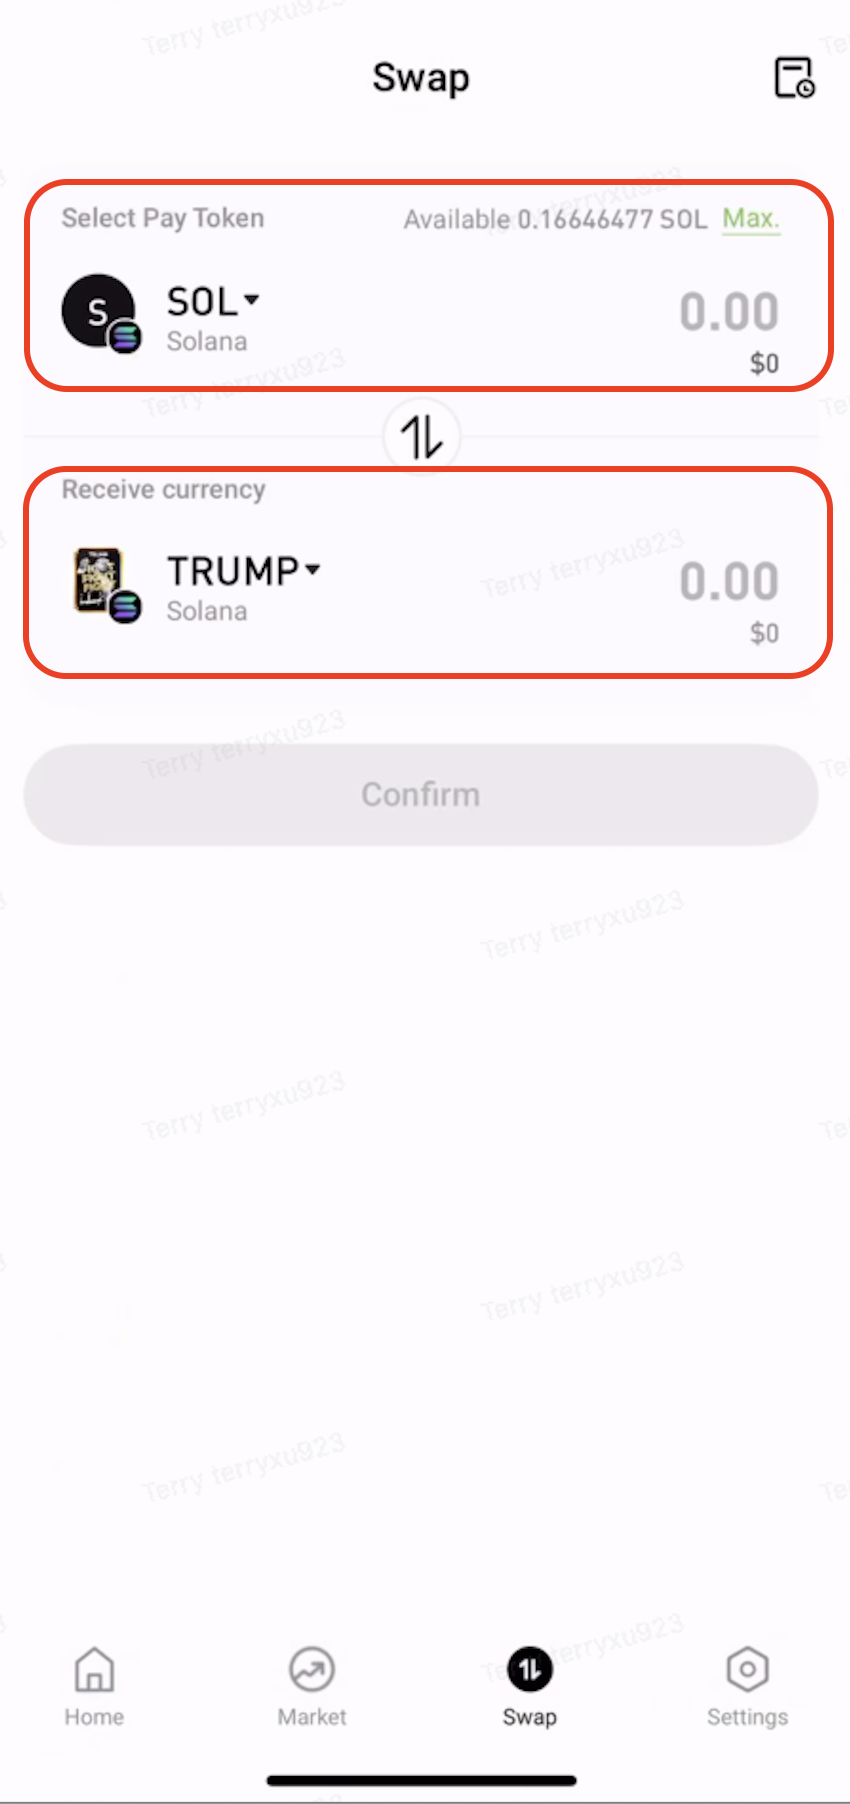
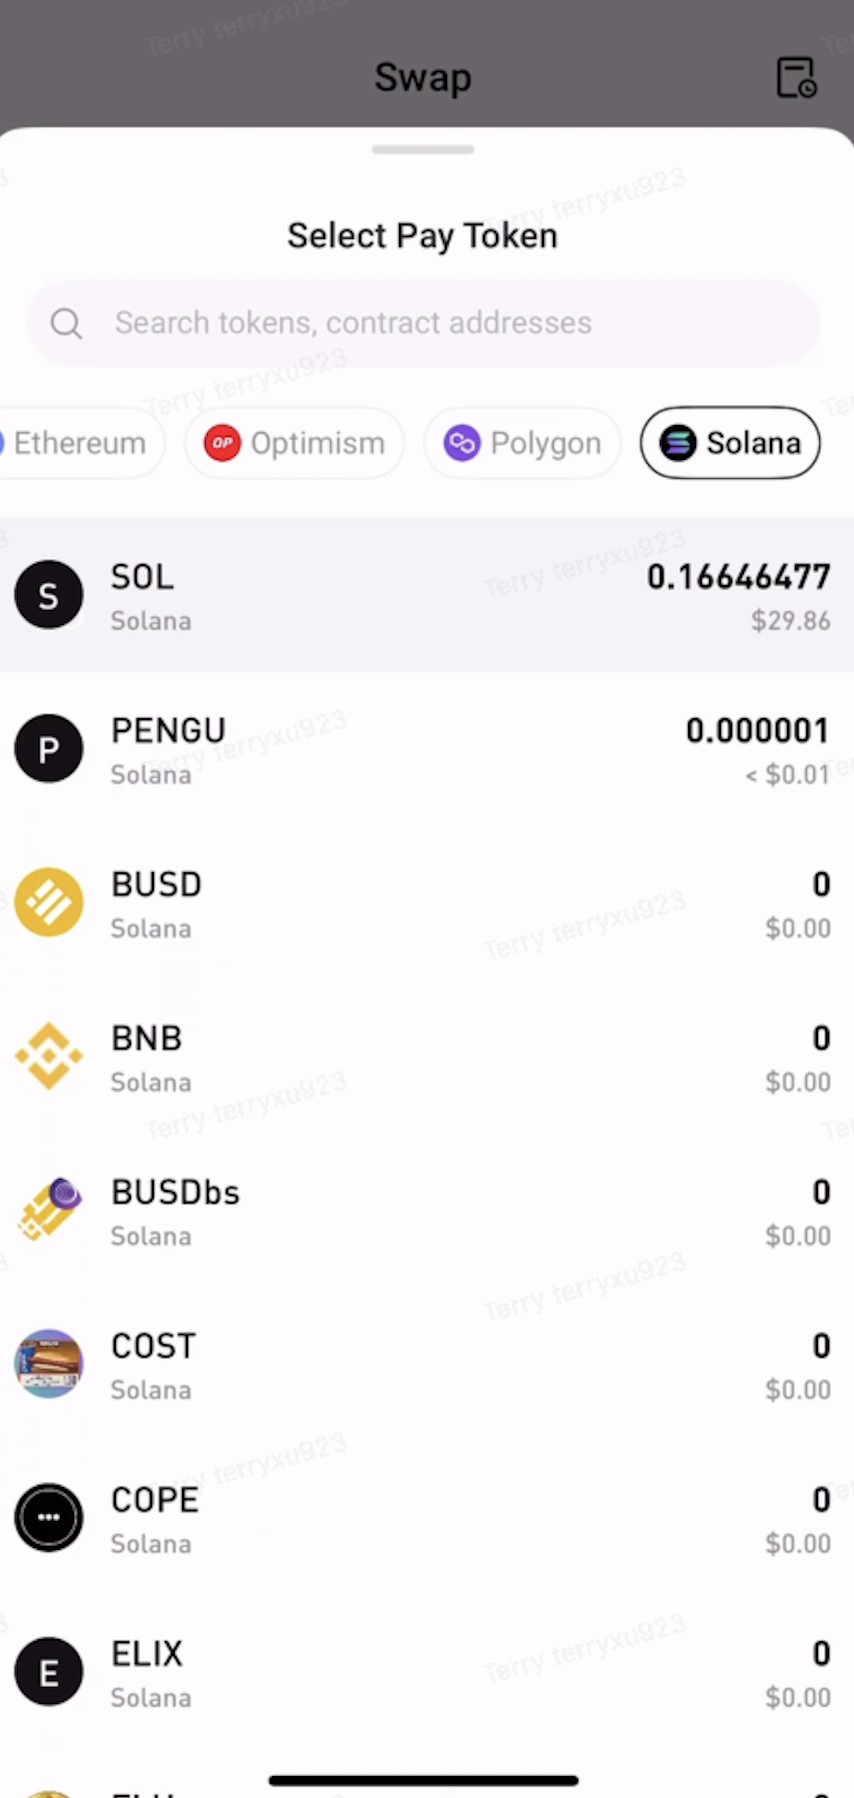
Under Pay, select the token and network to swap from.
-
Under Receive, select the token and network to receive.
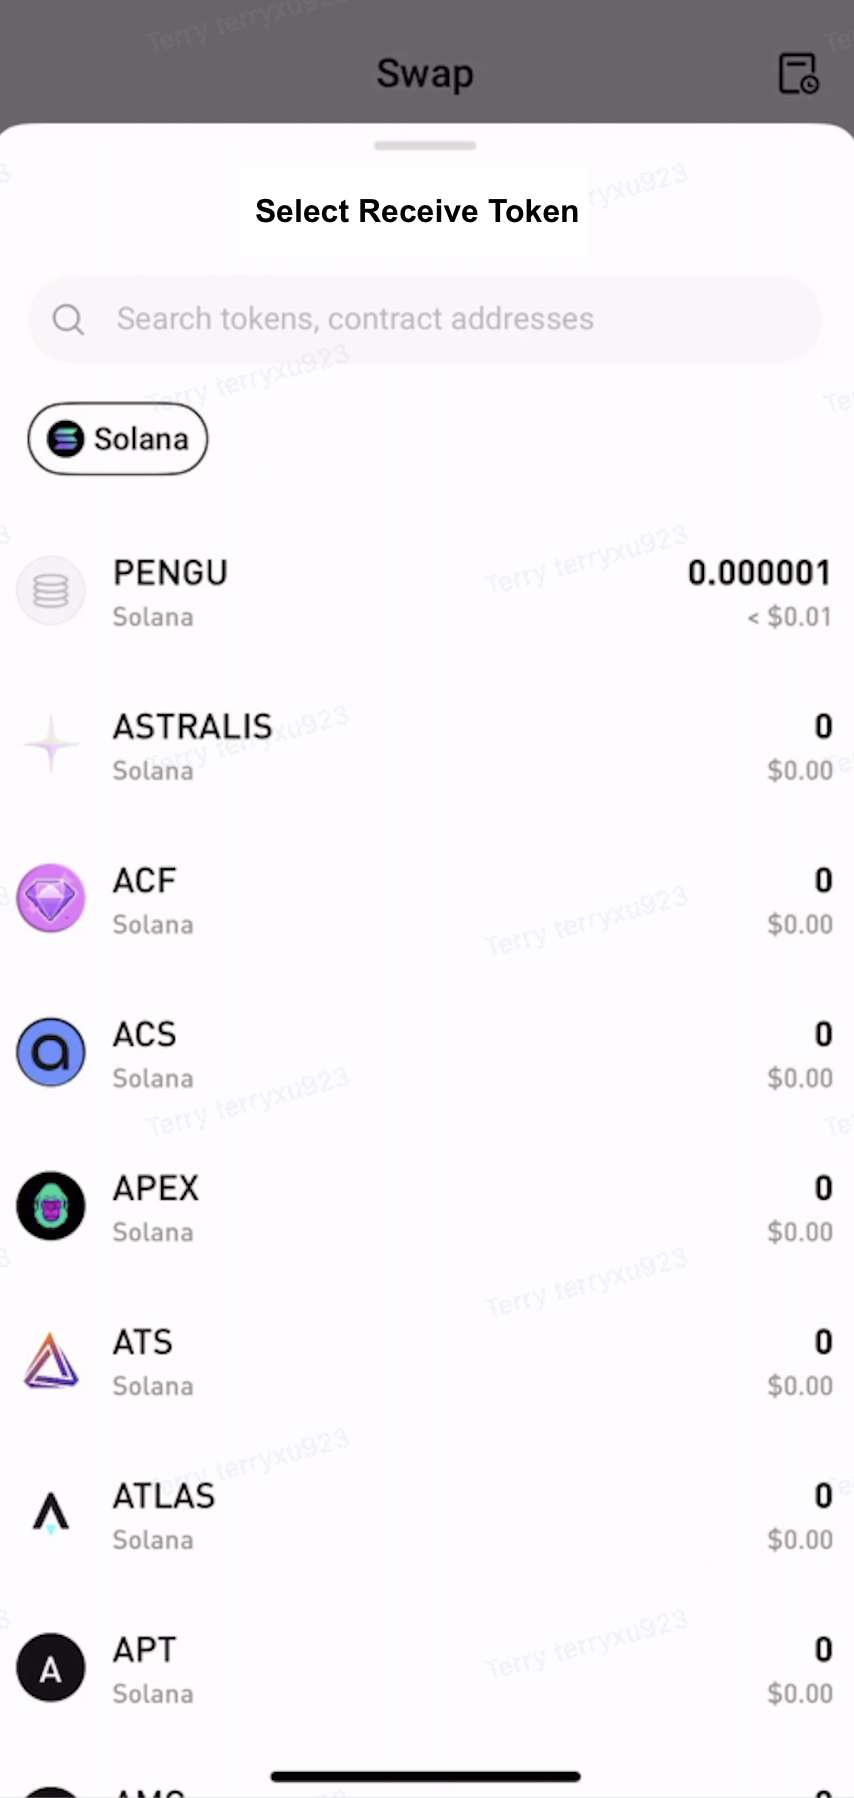
Step 3: Approve the Token
Enter the amount to swap. If approval is required, tap Approve and follow the on-screen instructions to sign the transaction.
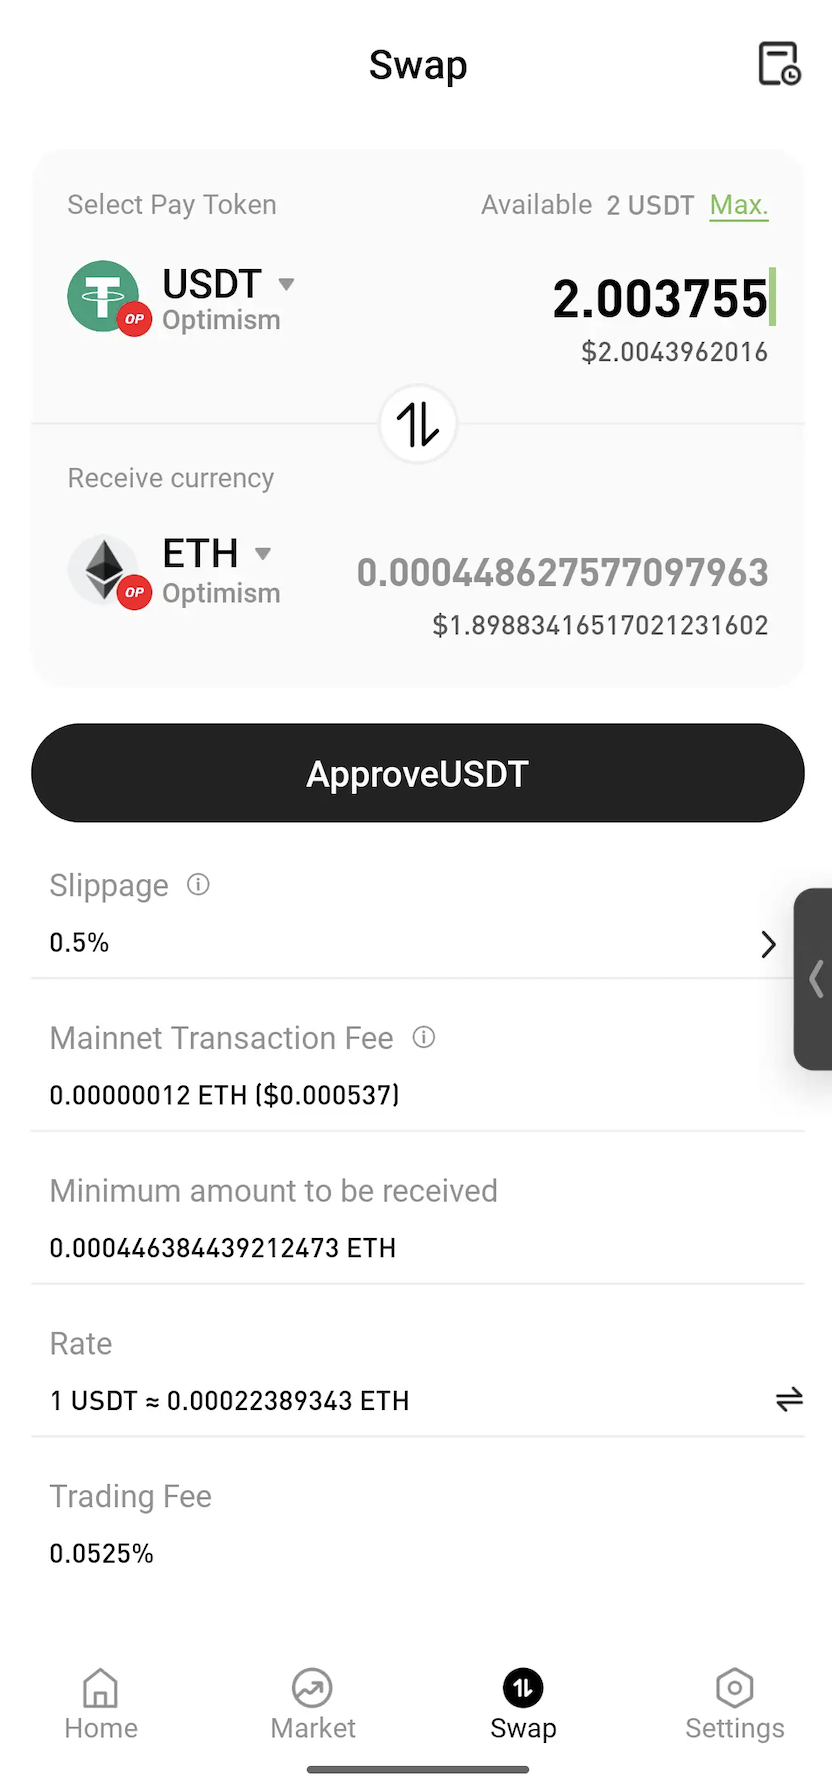
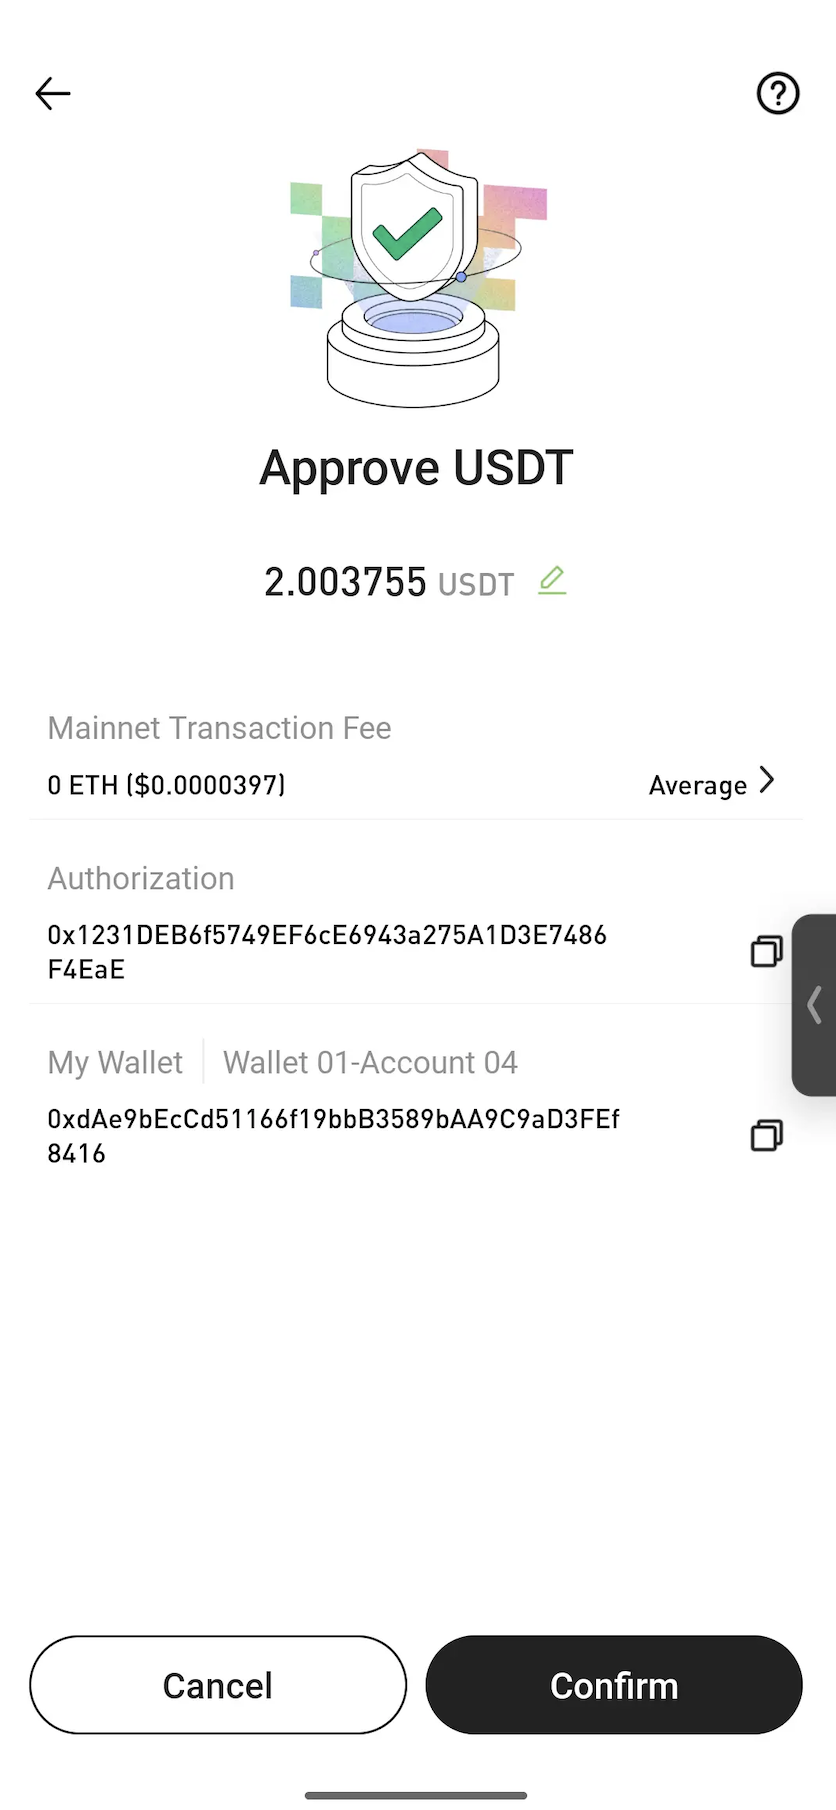
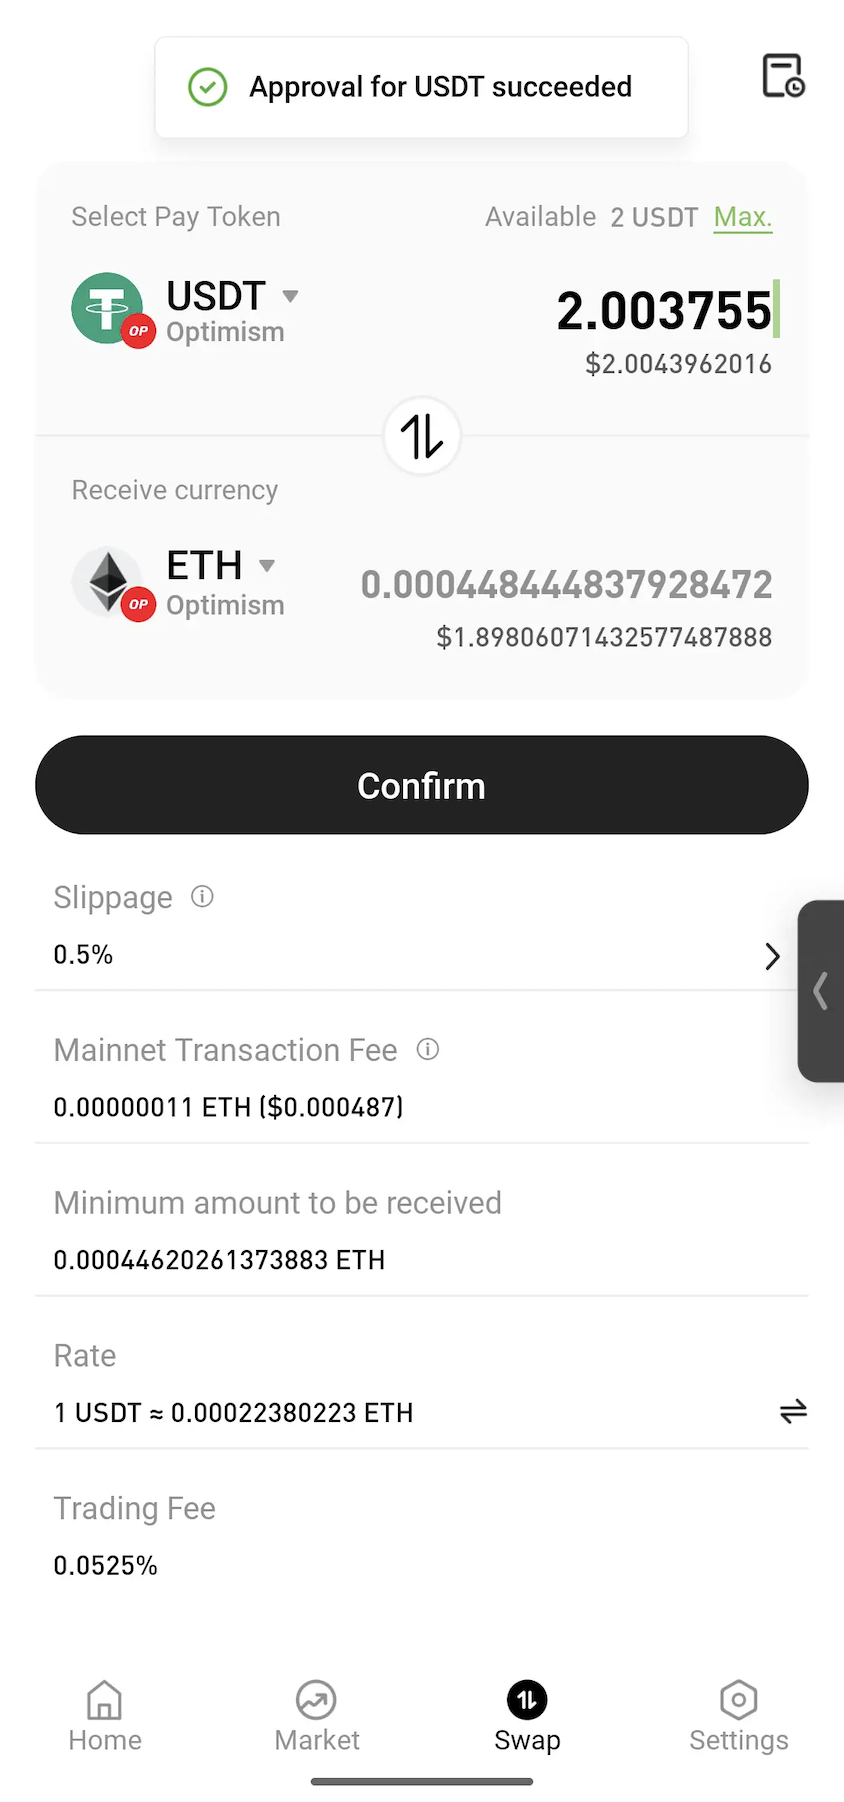
Note: Approval is a standard blockchain process that allows a smart contract to use the selected token for the swap. In most cases, approval is only required the first time a token is swapped.
Step 4: Confirm the Swap
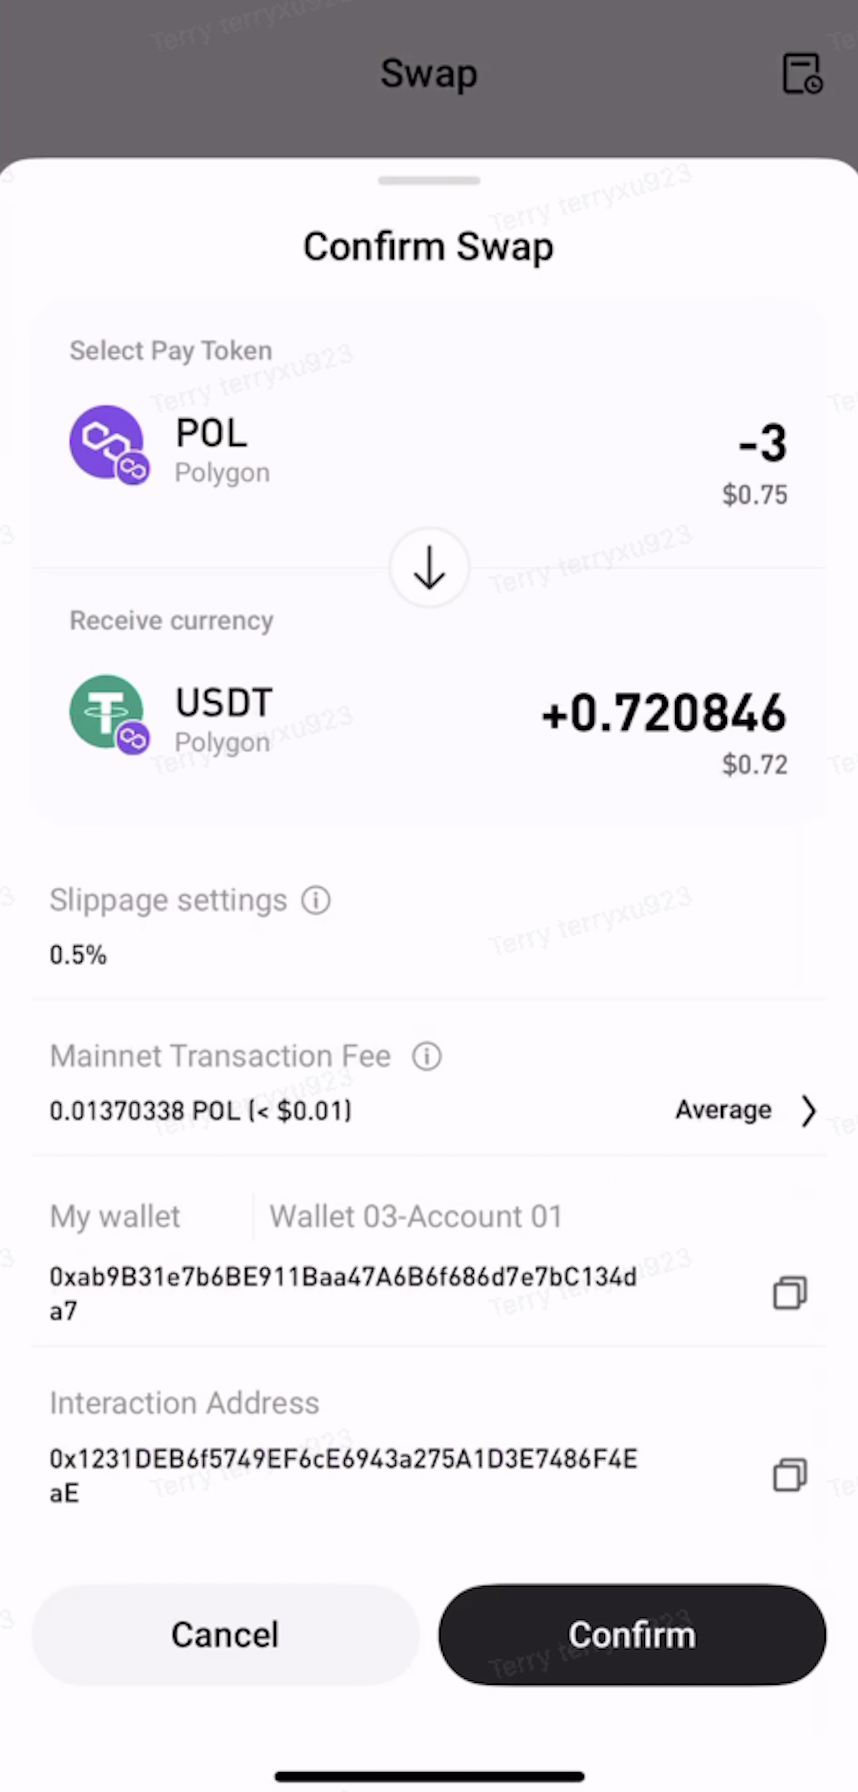
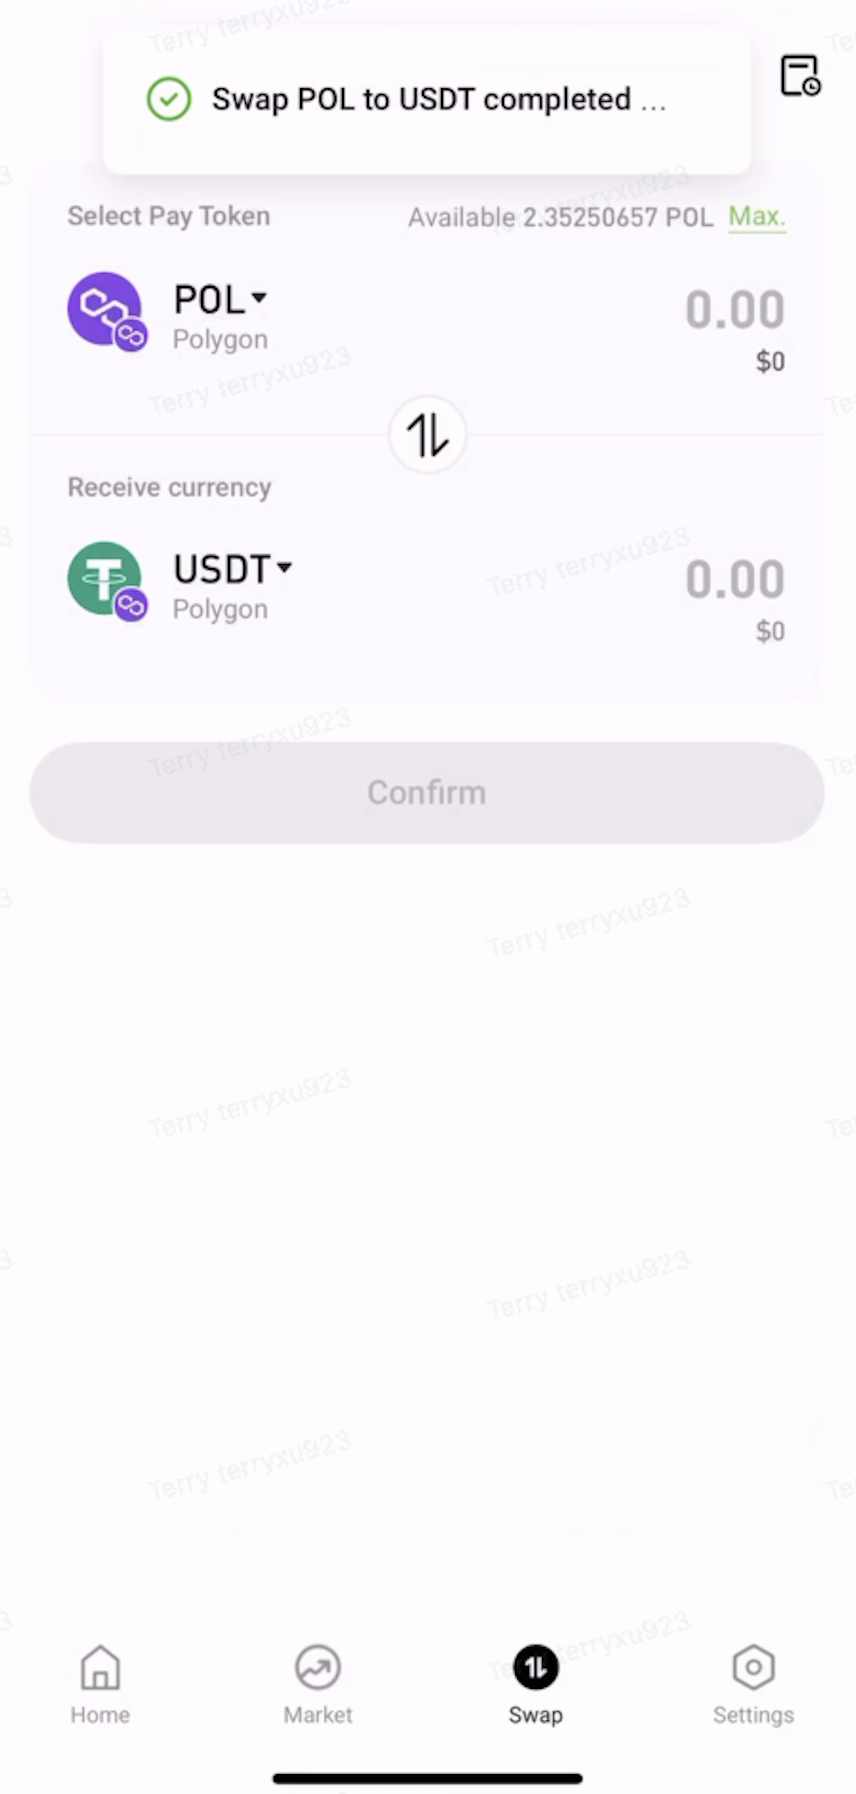
Review the swap details, then tap Confirm. Once the transaction is submitted, wait for on-chain confirmation to complete the swap.
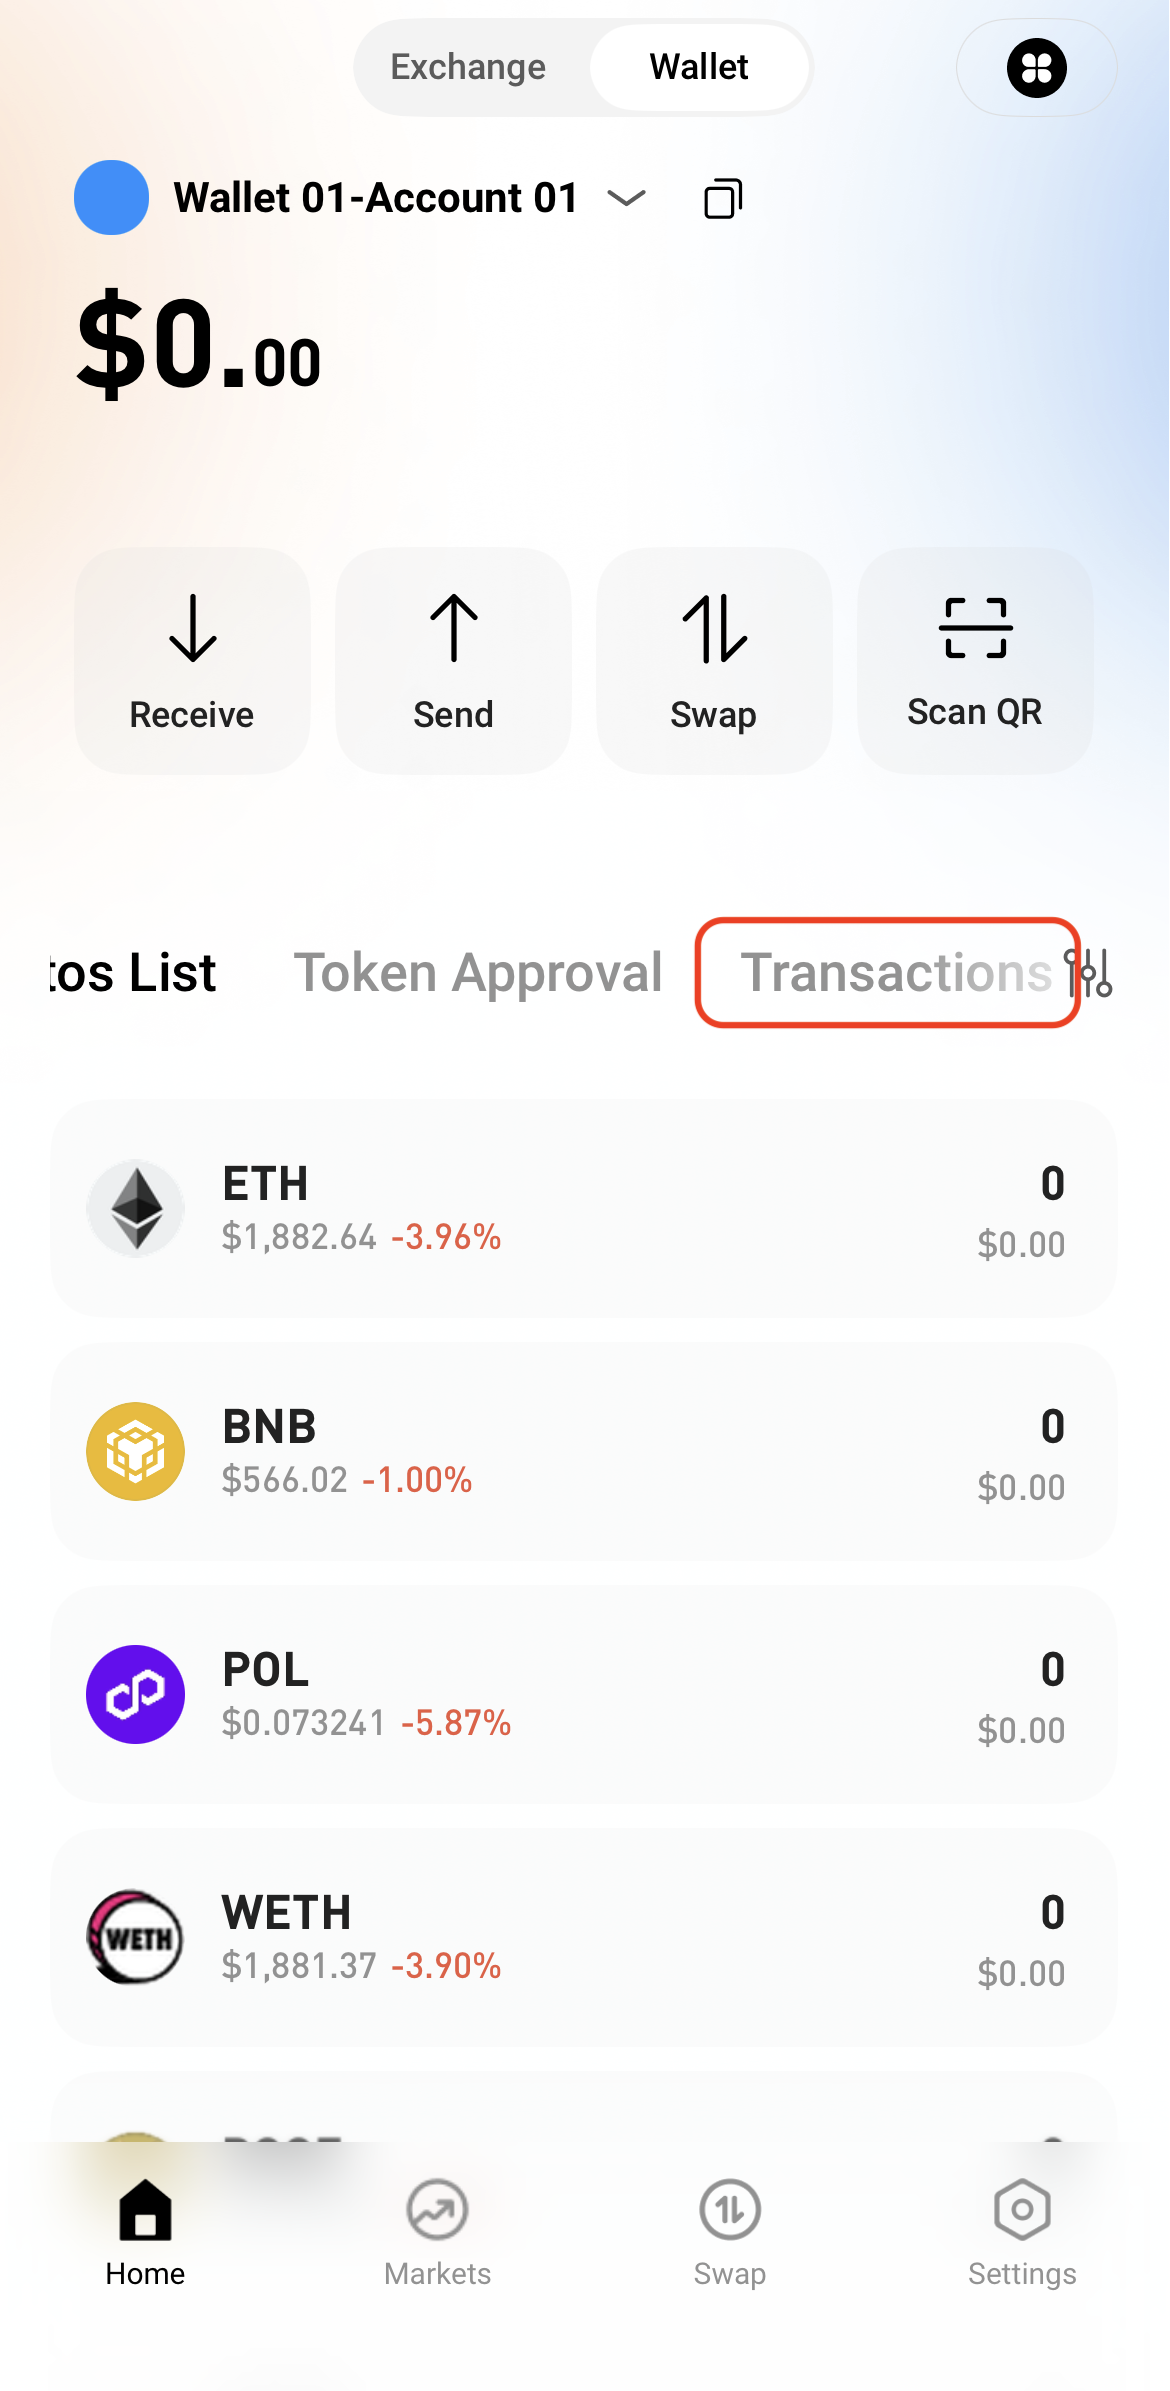
Step 5: View Transaction History
After the swap is complete, view the transaction details in Transactions or check the on-chain status through a block explorer.